
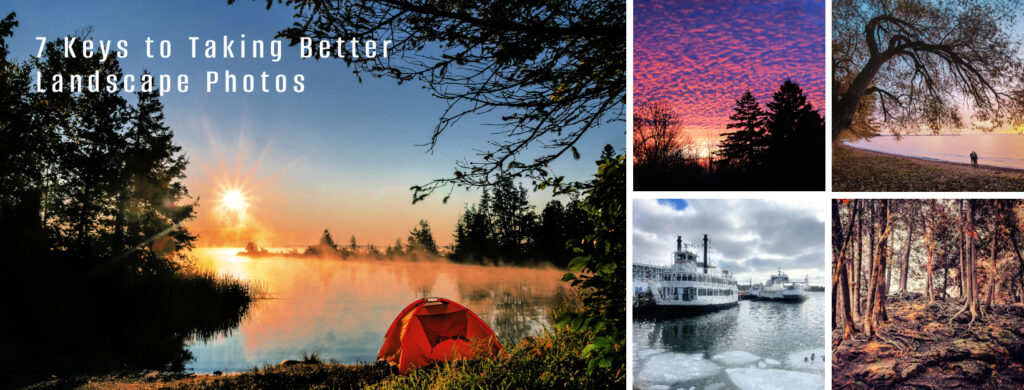
I’ve always loved travel & landscape photography and when I first picked up a camera, I thought better gear would automatically make me a better photographer. Like many beginners, I spent hours worrying about camera settings and equipment while overlooking some of the most important fundamentals.
Looking back, there are several simple lessons that would have saved me time, frustration, and countless missed opportunities. If you’re just starting your landscape photography journey, these seven tips may help you grow faster and enjoy the process even more.
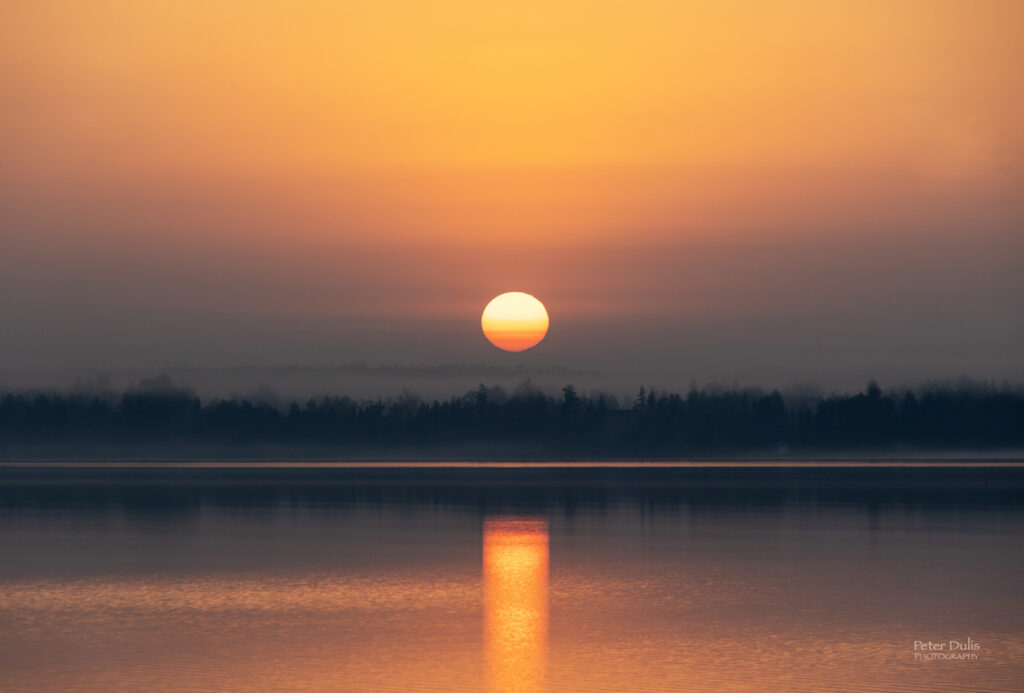
16-35mm lens; 1/50 sec; f/11; ISO 100; Aperture priority
1. Use Aperture Priority Mode to Control Depth of Field
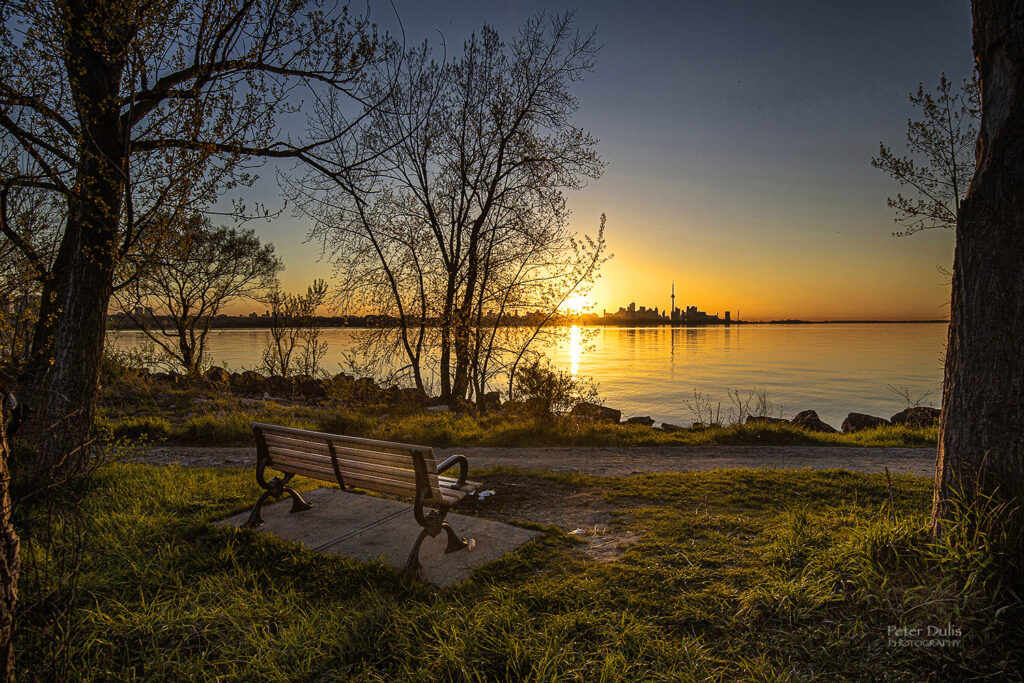
Many new photographers spend too much time worrying about every camera setting. One of the easiest ways to improve your landscape photography is to use Aperture Priority (A or Av) mode. In Aperture Priority mode, you choose the aperture and the camera automatically selects the shutter speed. This allows you to focus on controlling the depth of field—the amount of the scene that appears sharp from foreground to background. For most landscapes, I try using an aperture between f/8 and f/11. The beauty of Aperture Priority mode is that it simplifies the technical side of photography while still giving you creative control. Rather than constantly adjusting multiple settings, you can concentrate on composition, lighting, and capturing the moment. I love this Humber Bay Park location for great sunrise shots over the city of Toronto.
24-105mm lens; 1/60 sec.; f/13; ISO 100; Aperture priority
2. Use Your Histogram for Better Exposures
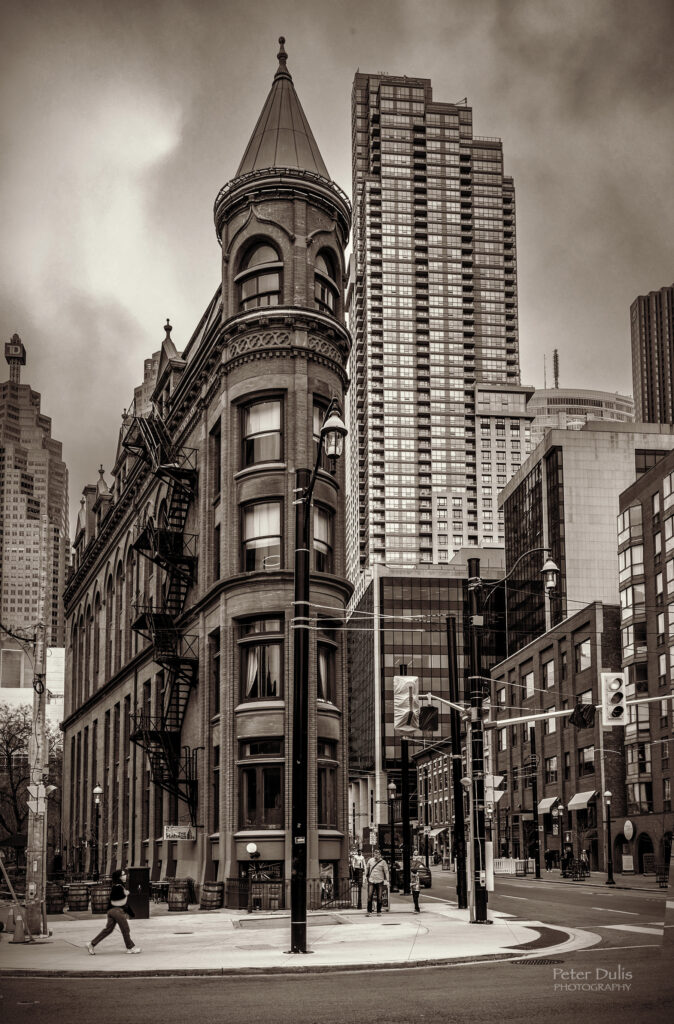
One of the most valuable lessons I learned over the years was to use the histogram on the back of the camera. Don’t judge exposure by the LCD screen alone. The histogram gives a much more accurate representation of the tonal information in your image. Learning to read it can help you avoid clipped highlights, blocked shadows, and disappointing results when you get home and view your photos on a larger screen. The histogram never lies—even when your camera screen does at times. This Gooderham Building, also known as the Flatiron Building in Toronto is one of my favorites to shoot at sunrise and since it was a bit cloudy that day, I thought the sepia touch would add to the antiquity of this building.
16-35mm lens; 1/30 sec; f/11; ISO 125; Aperture priority
3. Getting Sharp Landscapes
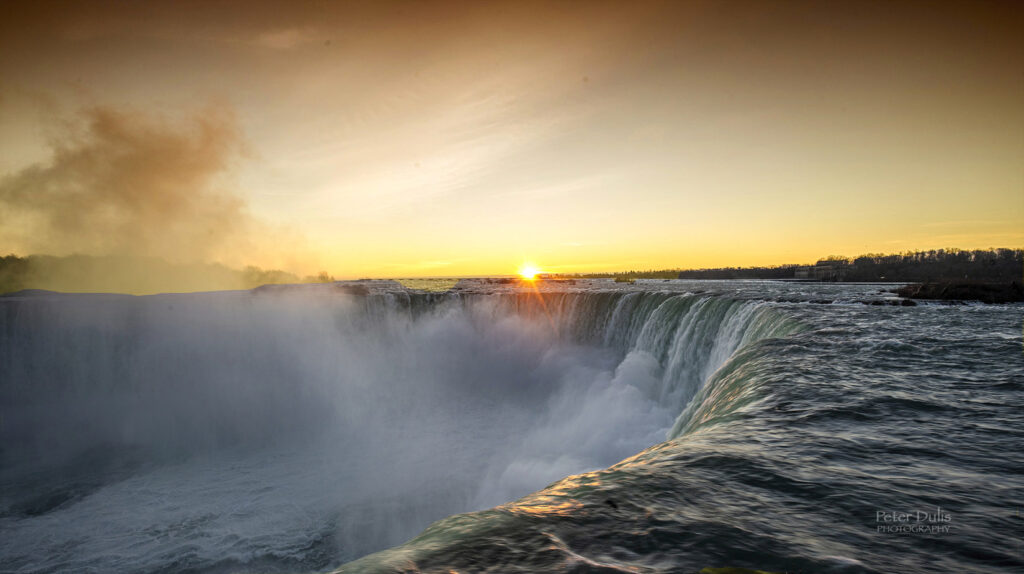
One of the most common questions I get in my photo workshops is, “Where should I focus to get everything sharp?” Calculating hyperfocal distance itself can be a complex topic, so I’ll try to simplify it. If you wanted everything sharp in your image, you could try focus stacking (a subject for another time), but what I do to maximize sharpness throughout the frame, is to focus about one-third of the way into the frame rather than on the most distant object (using f-stop 11 or smaller). This simple technique helps me to keep both foreground and background details sharp. For this Niagara Falls shot, I went to Niagara Table Rock Centre where I was able to shoot the thundering water just yards away. This is a great sunrise location.
24-240mm lens; 1/250 sec.; f/11; ISO 500; Aperture priority
4. Light Matters More Than Your Camera
The quality of light can make an ordinary scene look extraordinary. Learning to recognize good light is one of the most important skills a photographer can develop. Pay attention to the soft light during sunrise and sunset, often called the “golden hour.” Notice how cloudy days create beautiful, even lighting for portraits and nature photography. A great photo with beautiful light will almost always outperform a poorly lit photo taken with expensive gear. I use an app called “The Photographer’s Ephemeris” to plan how the light will fall on the land, day or night, for any location on earth. This photo was taken during sunrise at Balsam Lake.
iPhone 13; 1/120 sec.; f/2.2; ISO 50
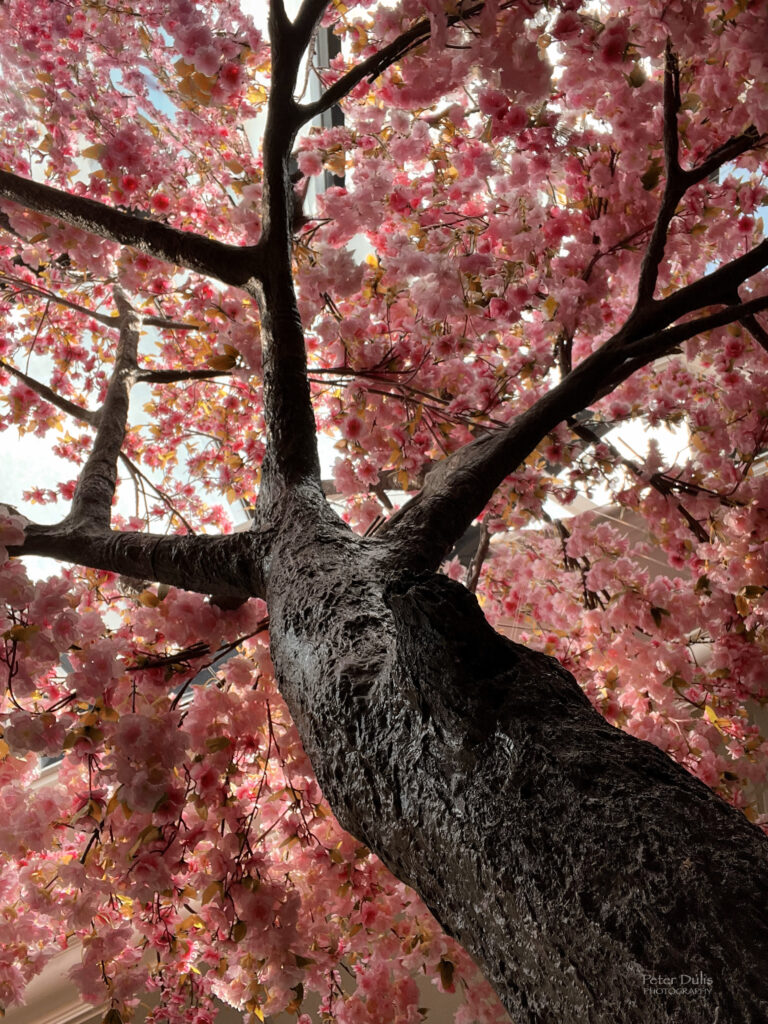
5. Simplify Your Composition
As the saying goes, “Every picture tells a story.” A cluttered photograph can distract the viewer and weaken that story. Before pressing the shutter, take a moment to ask yourself, “What is my main subject?” Then look for anything in the frame that does not support or enhance that subject. Pay special attention to the edges of your composition, where distractions often hide. Bright objects, utility poles, signs, and even unwanted people can draw attention away from your subject. By simplifying your scene and eliminating unnecessary elements, you can create stronger, more impactful photographs that communicate your message clearly. For this shot I was visiting a nice Greek restaurant with family and this beautiful tree was right in the middle of the round table. Talk about serendipity.
100mm lens; 1/80 sec.; f/11; ISO 160; Aperture priority
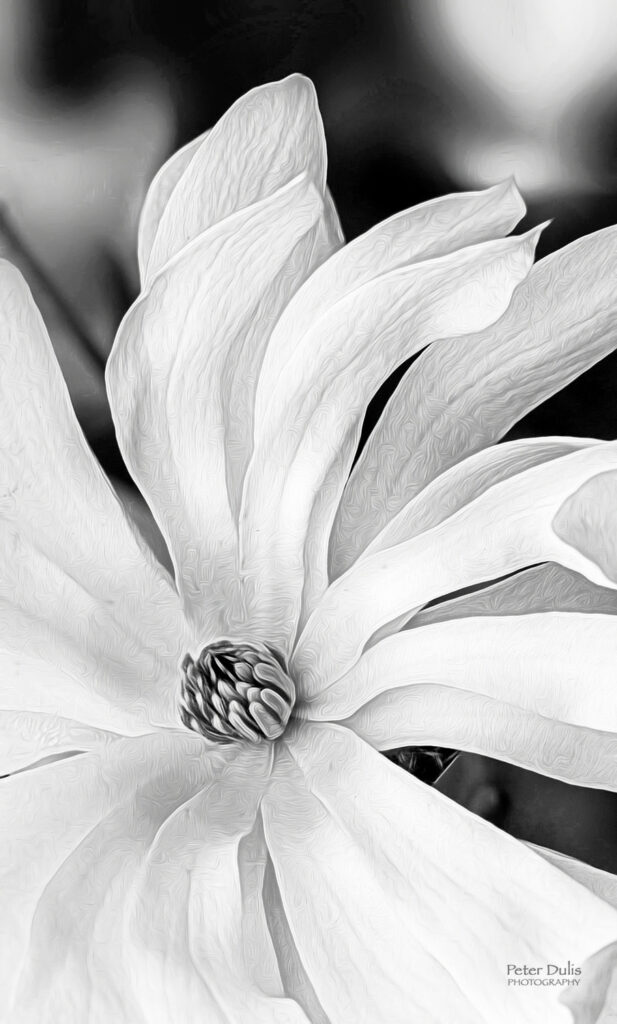
6. Slow Down and Observe
Photography is not just about seeing—it’s about noticing. Many beginners rush from one subject to another, taking dozens of photos without really studying the scene. Take a moment to look carefully. Watch how the light falls. Search for interesting details. Consider different angles and perspectives. Often the best image appears after you’ve spent a few minutes observing rather than shooting immediately. One of the easiest ways to improve your images is to keep exploring—move your feet, change your perspective, and try different lenses. This beautiful Magnolia flower grows in front of our house. Just love it!
24-105mm lens; 1/800 sec.; f4.5; ISO 100, Aperture priority
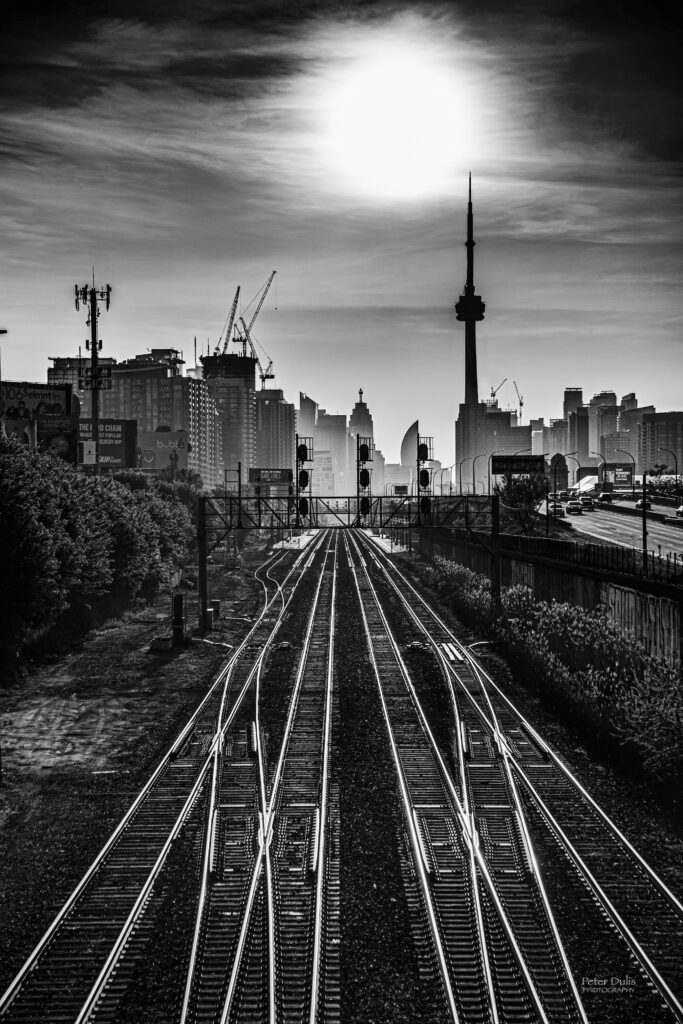
7. Photograph What You Love
In the beginning, it’s easy to chase trends or photograph subjects that don’t genuinely interest you. Instead, focus on what excites you. Whether it’s landscapes, wildlife, portraits, sports, architecture, street or macro photography, passion will keep you motivated to learn and improve. When you love your subject, you’ll spend more time practicing, and your creativity will naturally shine through. This photo was taken from the bridge near Fort York in Toronto at sunrise. The sepia tone adds to the antiquity of the railway history of Toronto.
Final Thoughts
Photography is a journey, not a destination. The camera is simply a tool—the real magic comes from learning to see the world differently. If I could go back and give my beginner self one piece of advice, it would be this: focus less on equipment and more on light, composition, and storytelling. Master the basics, practice often, and most importantly, enjoy the process. Some of your greatest photographs are still waiting to be captured.
The Finishing Touch
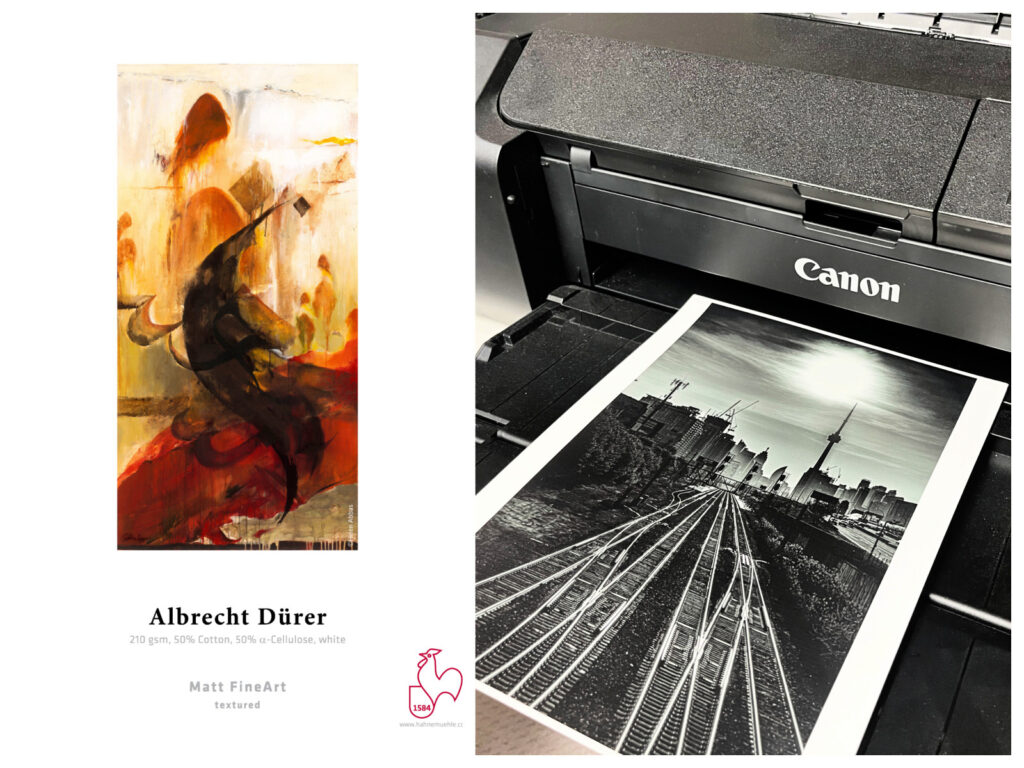
For this “Landscape” collection, I decided to use the Hahnemühle Albrecht Dürer paper. The Hahnemühle Albrecht Dürer is a genuine mould-made paper made from 50% cotton and 50% α-cellulose fibres. It’s really a unique textured fine art paper specially developed for FineArt applications. The white FineArt inkjet paper does not contain optical brighteners and has a classic, strikingly defined watercolour structure that added an artistic touch to the prints. Definitely worth a try and the Matte Textured FineArt Inkjet Paper Sample Pack is a great way to test this paper plus 4 others.
Happy Shooting & Printing!
Peter & Susan
Ps – Join us October 9-15, 2026 for this Nova Scotia Photo Workshop:
www.peterdulisphotography.com/photography-workshops