I’ve always enjoyed photographing landscapes and flowers. They seem to go hand-in-hand. So, this winter I decided to start a project with “Frozen Flowers”. I loved the wonderful abstract look that the flowers took on when frozen. It left a lot to the imagination in many cases. It’s a great project that you can do at home that doesn’t have to cost a lot. I started buying flowers off the 50% off clearance rack at a local food store. These flowers were in their prime but won’t have lasted much longer – perfect for freezing.
There are a variety of methods you can use, it’s very experimental. If you use regular tap water, you will get more of a cloudy, icy look. It seems that ordinary tap water when frozen, contains a lot of minerals and impurities that cloud the ice. If you want perfectly clear ice flowers, then you use distilled water. A lot of the bubbles that you see in ice flower photography is due to the compression of the flower in the ice. You get beautiful bubble trails that have escaped from the flower, frozen in the ice. I’m still experimenting with different techniques, but here’s a method that has worked well for me so far and am happy to share some tips with you.
The Method
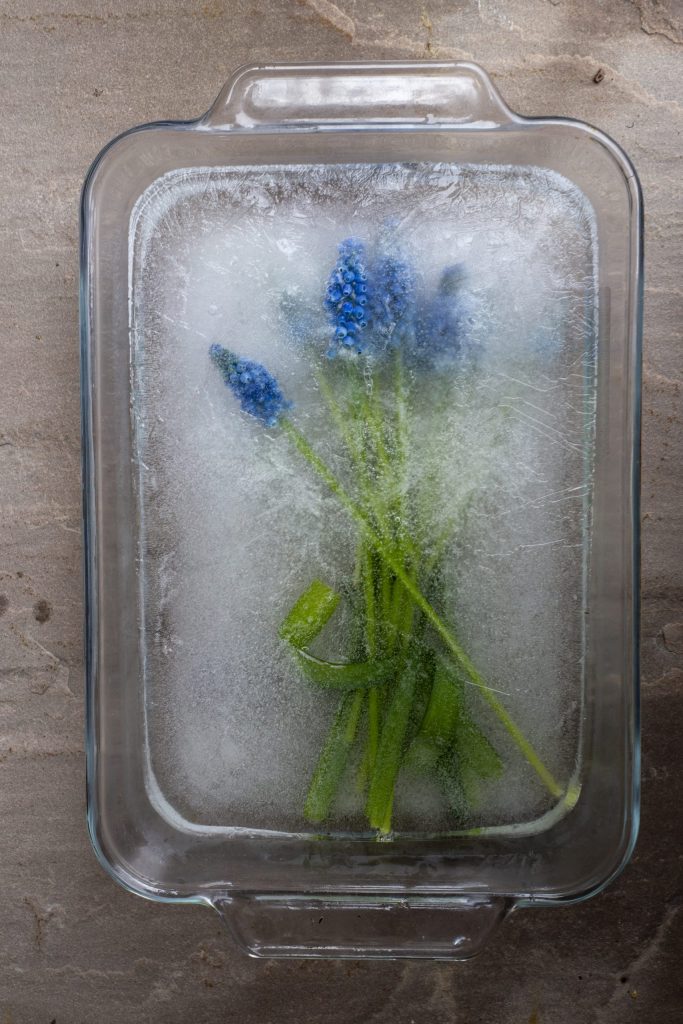
STEP 1: Is to find a suitable container
(The Tupperware container works great – the Flower vase cracked with the ice pressure)
You need to have a container that can handle the expansion of ice. I tried a regular vase once and the glass cracked in the freezer. So, Tupperware containers are much better, but you can also experiment with metal tins, plastic containers, I even tried beer mugs. Use a proper container depending on the size of your flower or if its an arrangement of flowers.
The Method
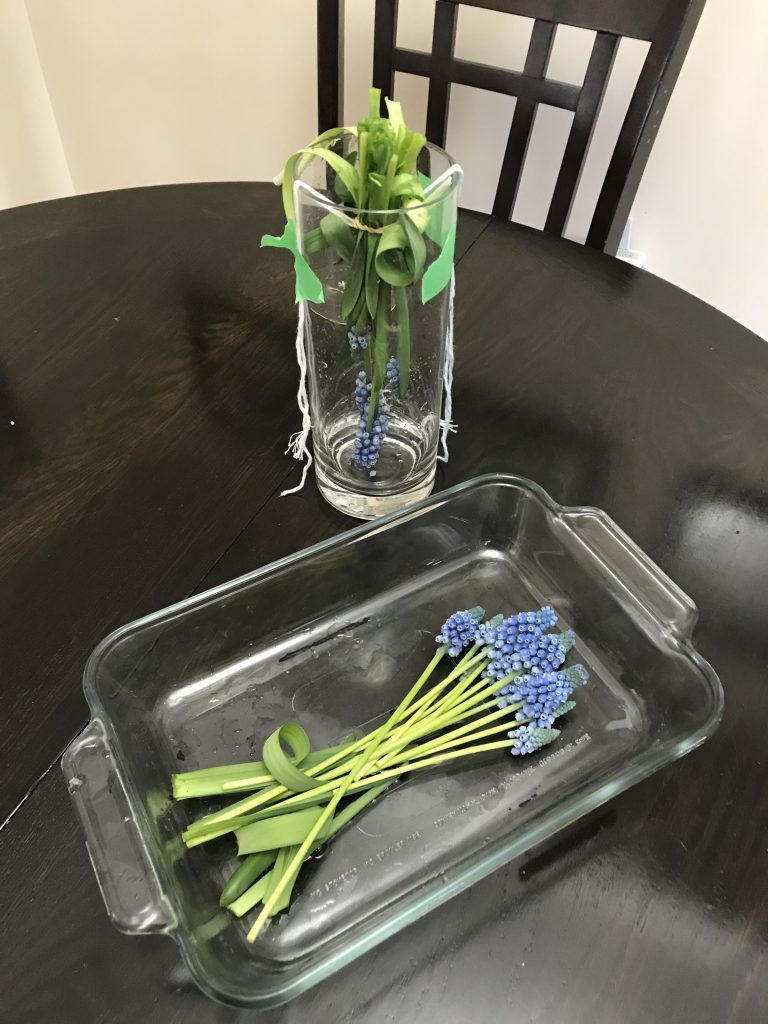
STEP 2: Collect your flowers or flower blossom, trim the stems, leaving a few leaves and arrange them in the container.
The beauty of freezing the flowers is that you don’t need to have them in pristine condition. If you are using a macro lens, then a large blossom will probably work better.
STEP 3: Anchoring the flowers to the container
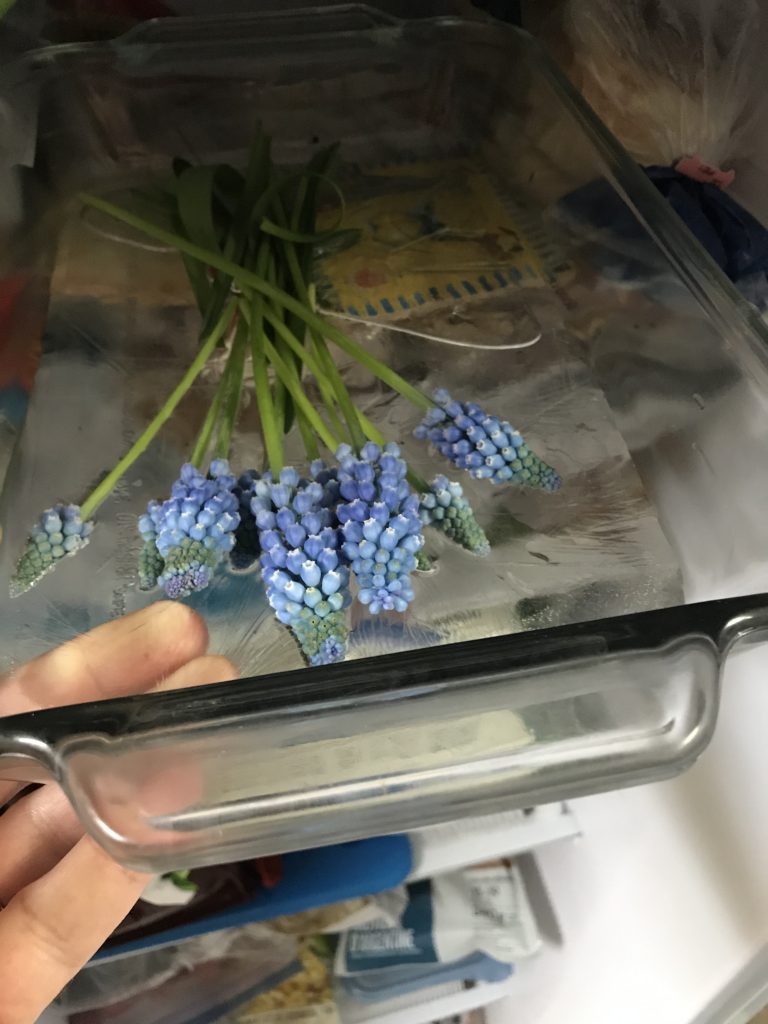
Place the flowers in the container and add a little bit of water. Remember that flowers contain oxygen, and oxygen is lighter than water. So, if you submerge your flowers into a full container of water and try to freeze them,they will simply bob to the surface, and stick out of the ice. That could be ok in certain situations, but not so good in others. Sometimes I like to leave a few flower petals sticking out above the ice for added interest.
Remember, this kind of photography is very experimental. A small amount of water on the bottom will help anchor your flowers in place. Retrieve your container after a couple of hours, and if the water is frozen, you can add more water. Do this in stages, filling in more water each time, and return the container to the freezer. Nice thing about wintertime in Canada is that I can also put the containers out in my garage to freeze.
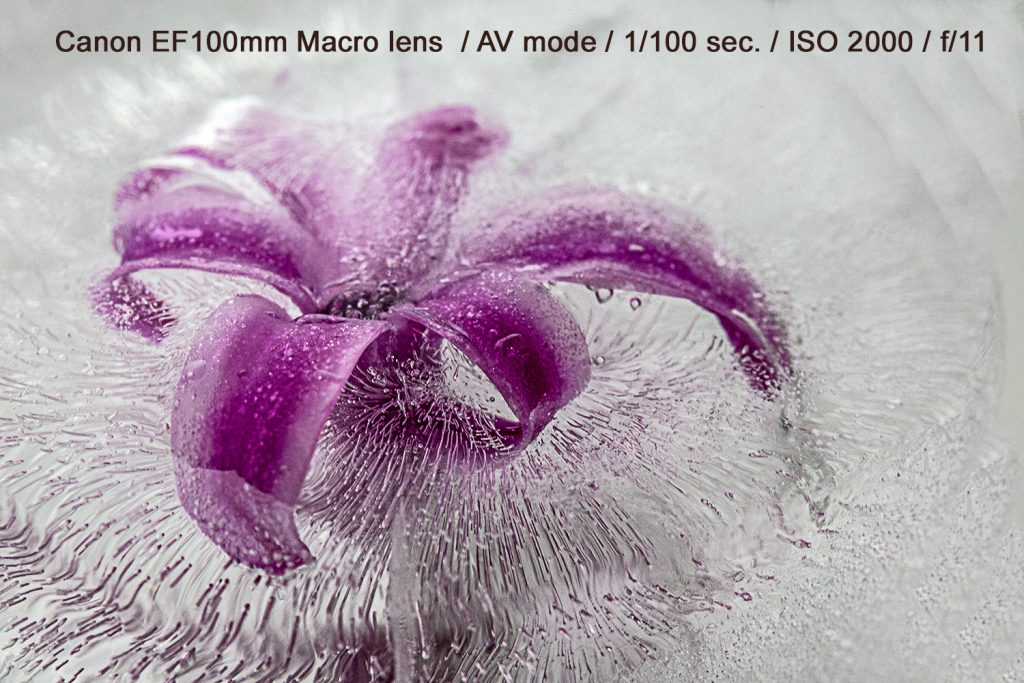
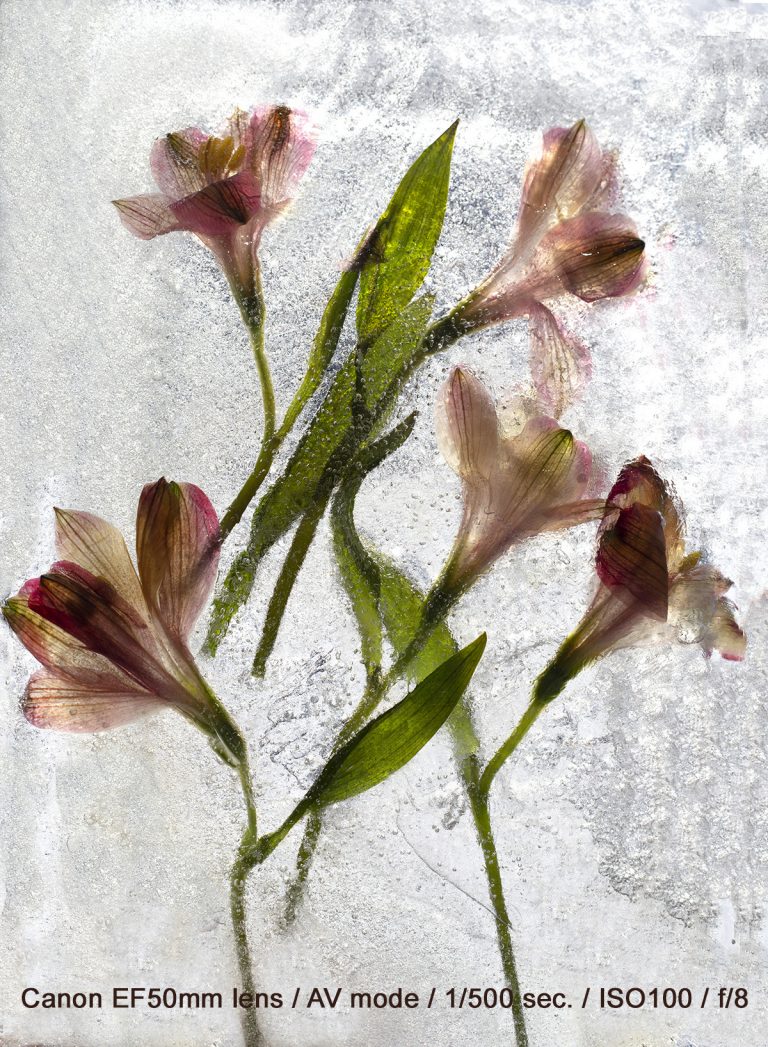
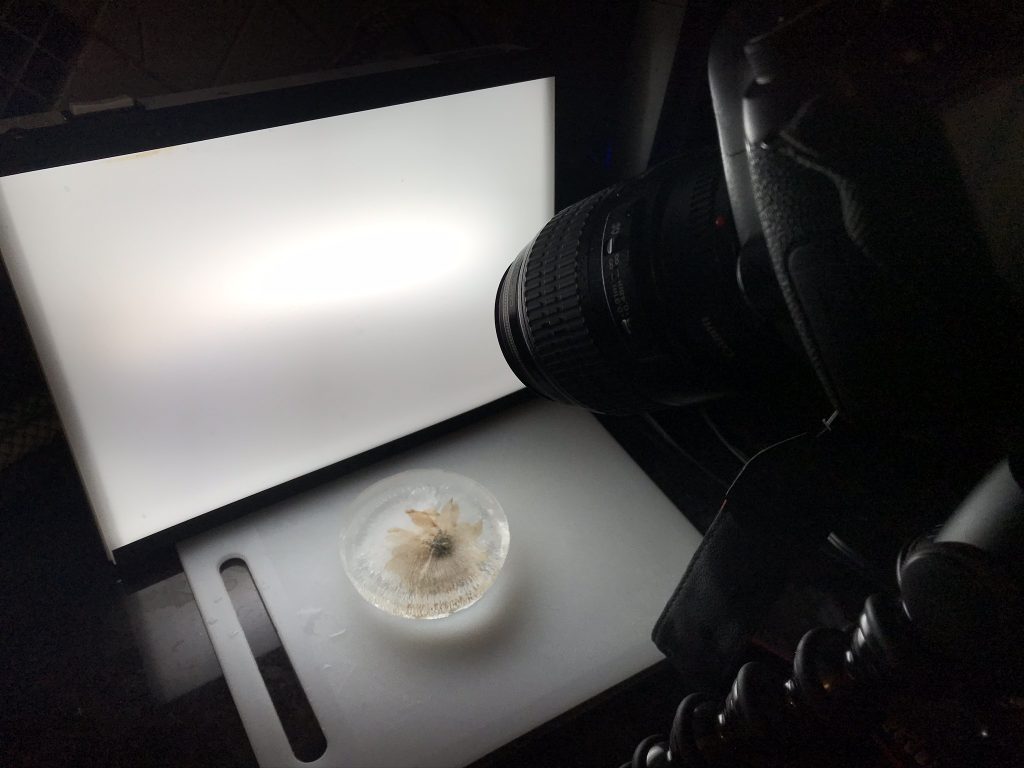
STEP 4: Photographing the frozen flowers
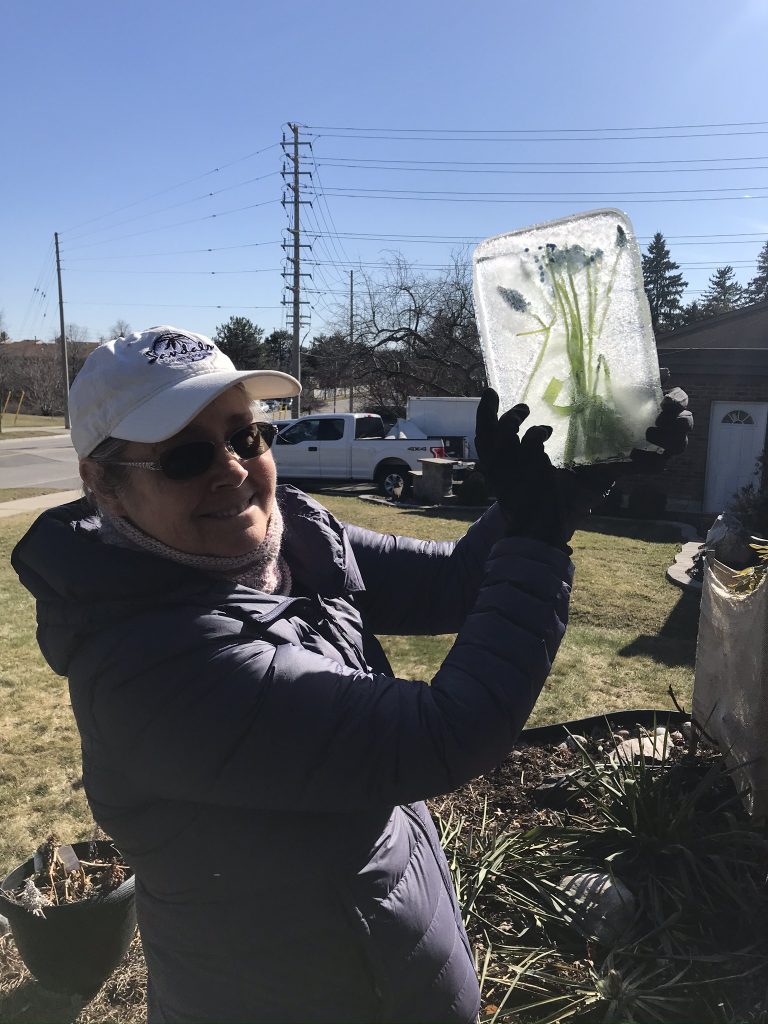
Now that you’ve created your ice flower masterpiece, it’s time to photograph it before it melts. I primarily use a Canon 6D DSLR camera with either a 50mm lens or a 100mm macro lens, but I’ve also used my iPhone to get good results. (If you have a DSLR camera you can also experiment with a polarizing filter) While the flowers are still in the Tupperware container, I will take some photos with different lenses, different backgrounds, change up the light by moving the container to different areas of outside shade (I like to shoot outside but not in direct sunlight with the container lying flat trying different colored backgrounds)
As the ice begins to unthaw, it will be easier to pop out the slab of ice containing the flowers. I’ve got my wife to hold up the slab of ice in front of the sun as I photographed it, and that turned out very nice as the ice became more translucent, but the flowers didn’t show as much detail. (You can also lean the slab against a inside window and get this effect) You can also take your flower ice slab to the kitchen sink and use a sheet of white opaque plastic to rest the slab on over the sink. The stainless kitchen sink makes a perfect reflector when you place a light underneath the opaque plastic sheet.
I also have a light box that has come in very handy for backlighting or side lighting.
As the frozen flower slab begins to melt, continue to photograph the results, you may be surprised at the varying results
Sometimes certain flower will turn brown after they are frozen. If you don’t like this, you can covert the image to black & white or add a color tint in programs like Photoshop or I also like to use an on-line program from https://www.picmonkey.com/
Conclusion
Now that you understand some basic techniques, have a go with different combinations of flowers, containers, backgrounds, etc. With a few simple utensils in the kitchen, you can be creating wonderful works of art in no time.